
First, here's what didn't work.
I was going to use biscuit joinery to put everything together, but I failed to take into account how big the parts really needed to be. Specifically, I measure a biscuit itself instead of the slot that the joiner tool cuts. I made the rails too narrow, so that the slot for the biscuit extended out the top and bottom. I reasoned that I could decrease the depth of cut, and sand the biscuit to fit. I even made this magnificent fixture to make sure everything stayed aligned:

But I made some test pieces, and there just wasn't enough surface area in the joint to bear much weight. I could easily break the pieces apart - not good for holding my precious wine. OK, so I really only drink cheap wine, but I'd hate to lose that too.
I started over, and decided to use mortise and tenon joinery. In the photos below, the left photo shows the tenon and the right a matching mortise. Notice that the corners of the tenon have to be rounded to match the mortise. I did it with a file on this test piece, but was able to use a small belt sander once in production mode.

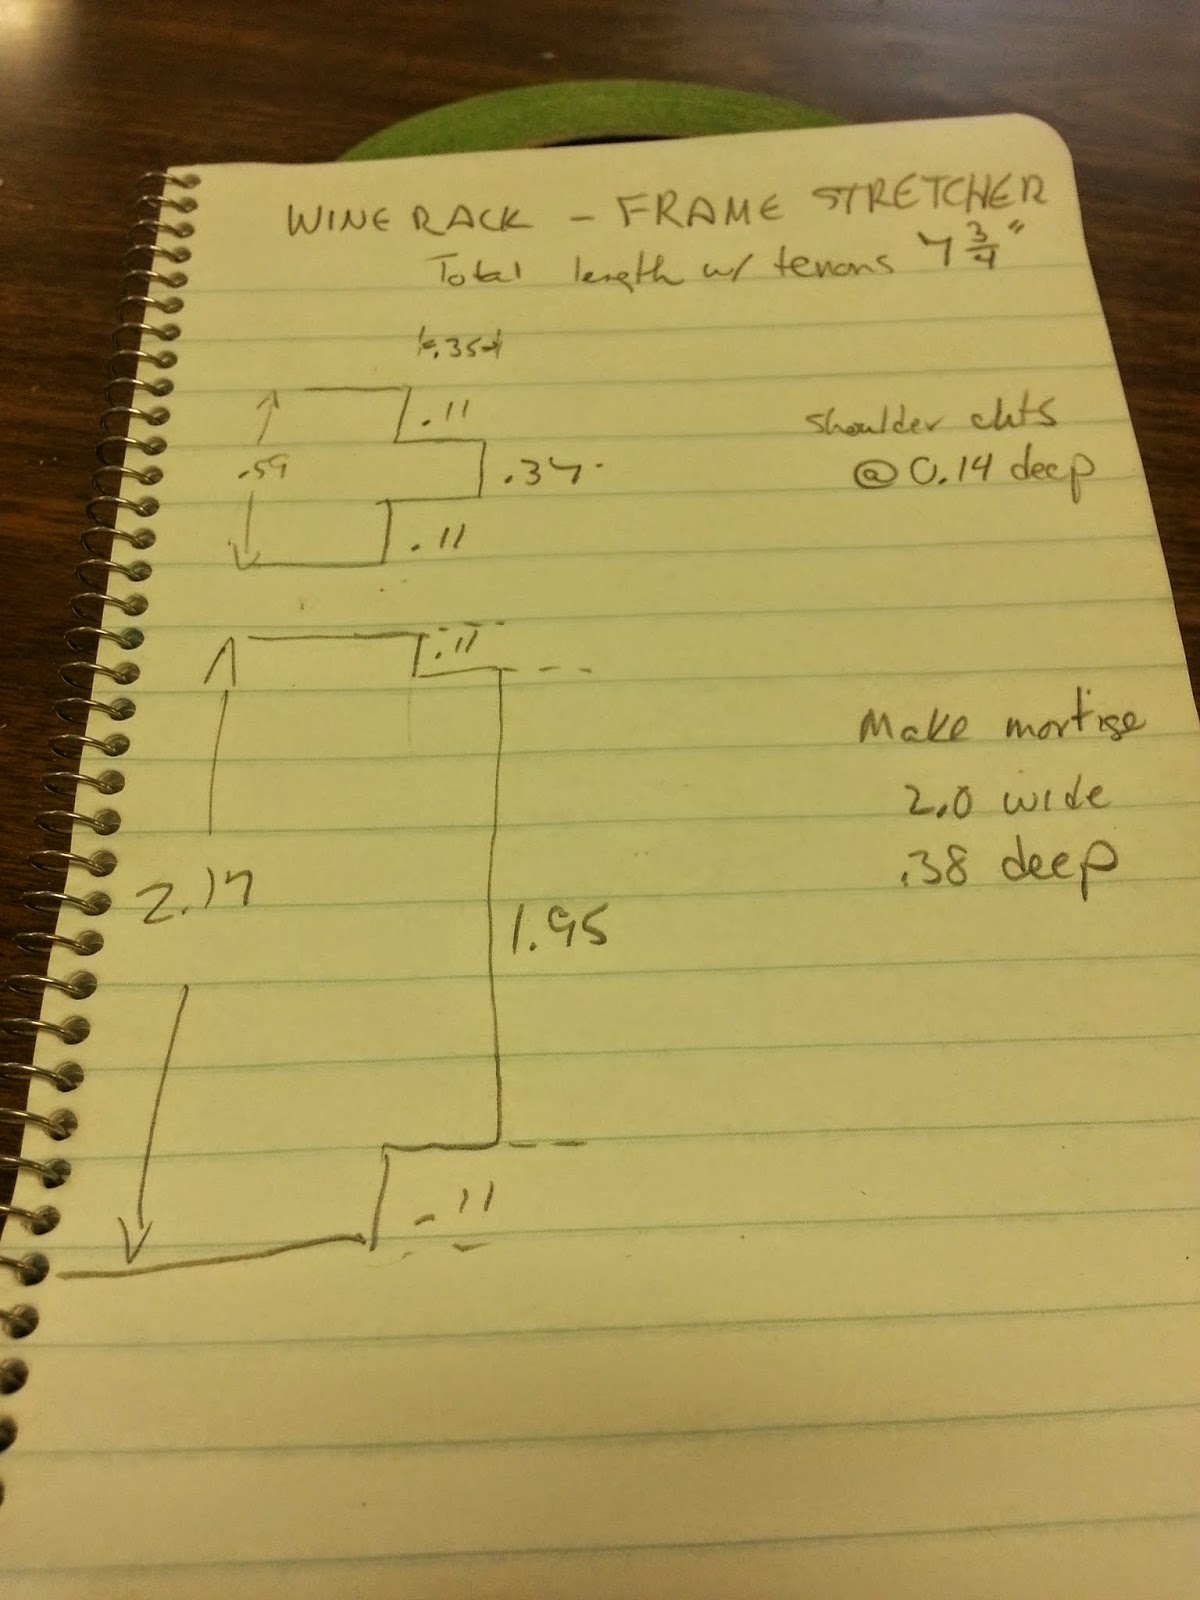
I milled 20 stretchers, plus enough extra for some test pieces, and then started creating the tenons. First, I had to establish the exact dimensions of the tenon. No need to try to decipher the figure below; it's just there so I can refer to it later. If you are really curious, double-click it to get the full-sized version.
I also had to make a special fence for the router table, so that the router bit was barely showing. With the stock fence, the hole was so big the workpiece wanted to fall through.

Since I had computed the dimensions to the hundredth of an inch, a digital height gauge was perfect for setting things up on both table saw and router table. Note that you can establish the depth to the fence by butting the gauge against the fence - when actually measuring, I held it tight to the fence with my hand. I still needed to fine-tune the router bit depth of cut for a precise fit, but everything else was just right.

Finally it was time to make some cuts. I first used the table saw to establish the shoulder of the tenon - four cuts on each end. That cut is actually deeper than the actual tenon face, which undercuts the tenon. That's so there's no junk in the corner that might keep the joint from closing tight. Then I moved to the router table to cut the actual tenon faces. That took several test cuts first to get the bit set exactly right, but there's still some finesse required. I could make the tenon thickness vary by as much as 20 thousandths just by the amount of pressure I used when cutting. That's the difference between not fitting at all, and pretty loose! I wound up testing every cut with by inserting it into a test mortise, and re-cutting if it didn't fit.
Finally, I had a stack of 20 stretchers with tenons cut, I then moved to the belt sander and carefully rounded them over. Let's see, there were 160 cheek cuts (8 per stretcher), probably over 200 router cuts for the faces, and 160 corners to round.

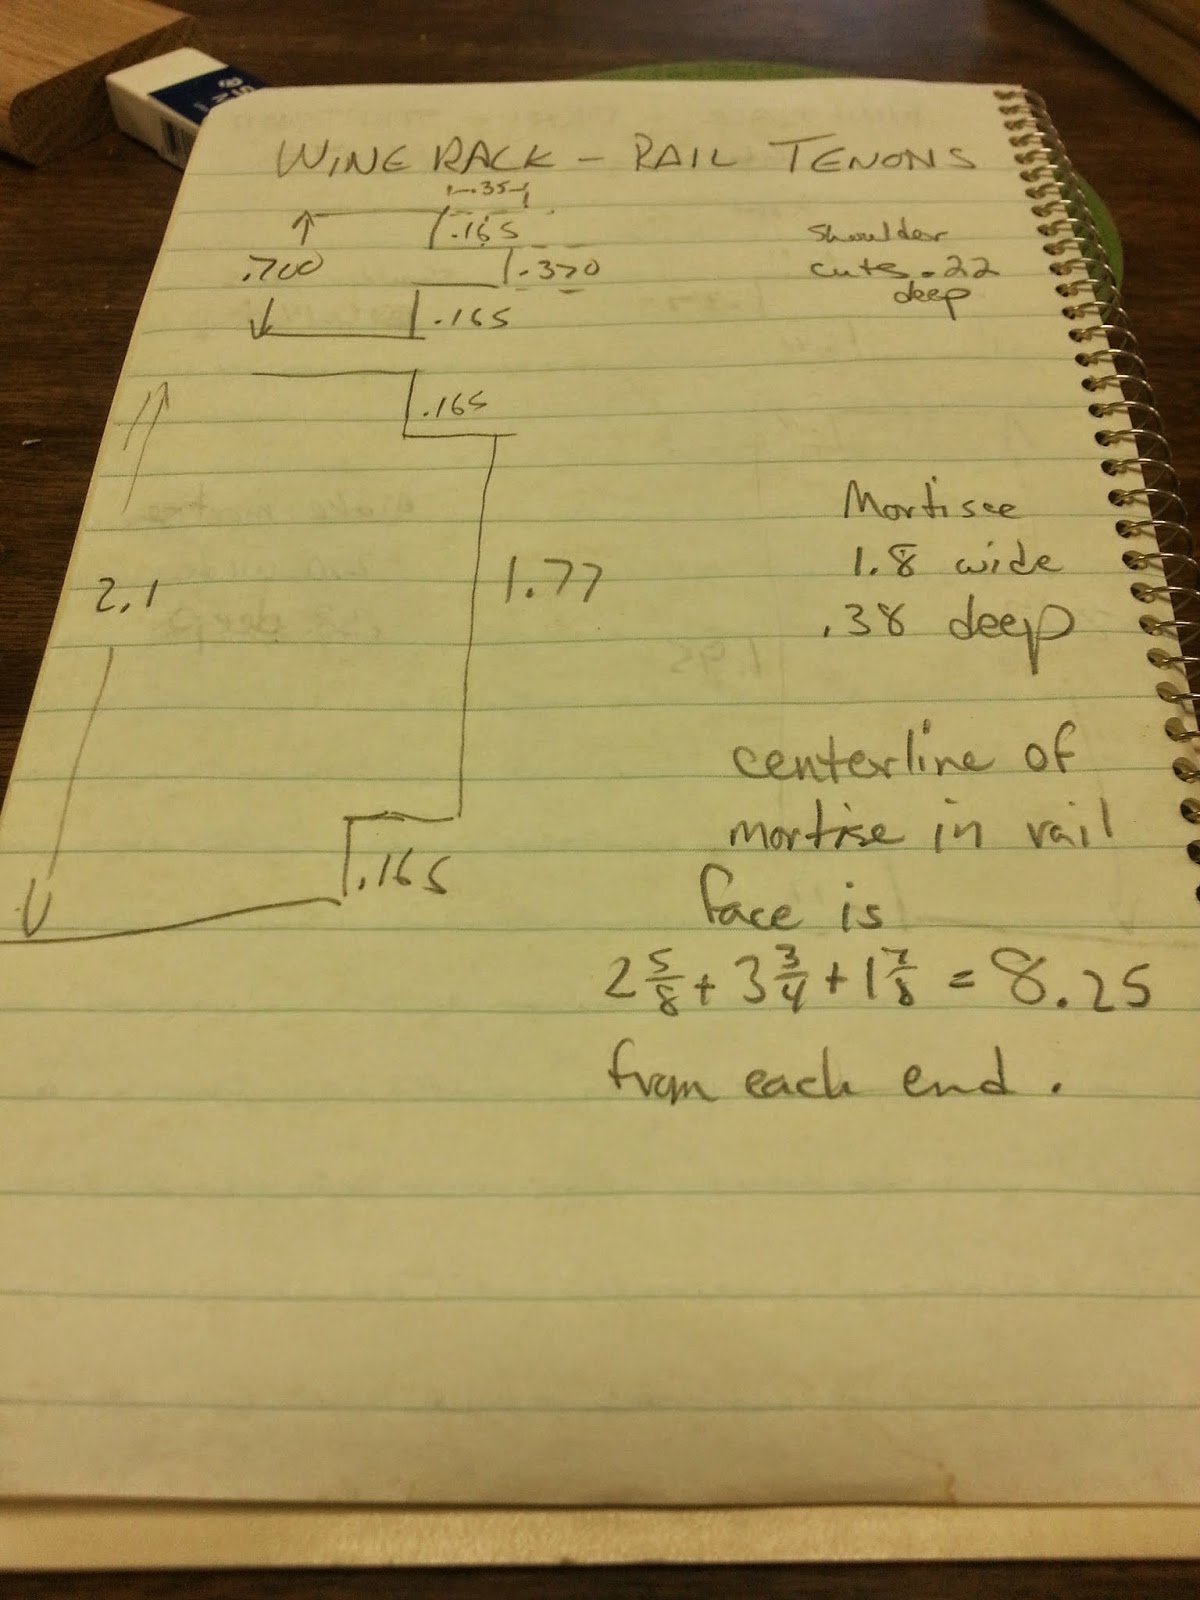
But wait! The rails need tenons too. Same process, but different measurements, because the wood is thicker, and rail is wider than the stretcher. Important to remember: only the blade/bit height changes; the fence setting stays the same. Here are the matching measurements:
I did one pair of rails to start, and then started thinking about milling the mortises in the faces of the rails. At first I wanted to do it on my mill, but it's just too small. The table didn't have enough travel, and it also doesn't have effective "stops" so that I can set up repetitive cuts. However, the mill was extremely useful in making this jig instead - I don't know how I could have precisely located that slot, and very precisely established its length, without the mill's precise controls.

To use it, you place the jig on top of the rail, and locate the rail using the tabs on each end. Note that it's double-sided. One mortise is cut with it face up, and the other face down. That ensures that the mortises on the front and back rail line up exactly. Here's the setup - the double clamps on each end are necessary! It squirms otherwise. The brass bushing in the center of the router fits into the slot, and then you plunge the bit to make the cut. Plunge full depth on left and right extremes before cutting the slot, and remove the router and vacuum out chips after every step - otherwise, you won't get a full-width mortise. Ask me how I know!

Once the front and back rail were cut, here's how the parts looked, laid out and ready to glue:

Glue, clamps and time, and the result - one rail assembly, square, flat and ready to go!

Just nine more to go, and then I can finish designing the case that will hold it all. I'll also probably sand, stain and finish (with polyurethane) each assembly before going on, because that's much easier to do before it's all built into a cabinet.
When my late friend Dave and I used to build big projects like this, somewhere in the middle I'd say, "If we EVER finish this thing, all I'm going to build after this is small boxes!" His answer was always the same: "Yeah, right." I guess he knew I didn't really need a small box. But a wine rack? THAT I will use!
No comments:
Post a Comment