

The Part 13 blog post detailed replacing that shifter with one from a Volvo P1800 that worked properly, and that was more appropriate for a sports car. More recently, in Part 21 I removed the floor and the braces that located it, and with Phil Biechler's help welded in mounts for seat belts. Now it was time to put everything back together with multiple improvements, and be back on the road.
The first hurdle was to improve the way the floor was mounted. The rails that mount the floor had never been properly attached when the car was converted to Volvo power back in the day. Instead, they were held only at the back, and the floor boards were floating on top. I began a long-winded process to figure out their correct orientation in three dimensions, and then made a convoluted adapter to tie the rails to the modified crossmember:
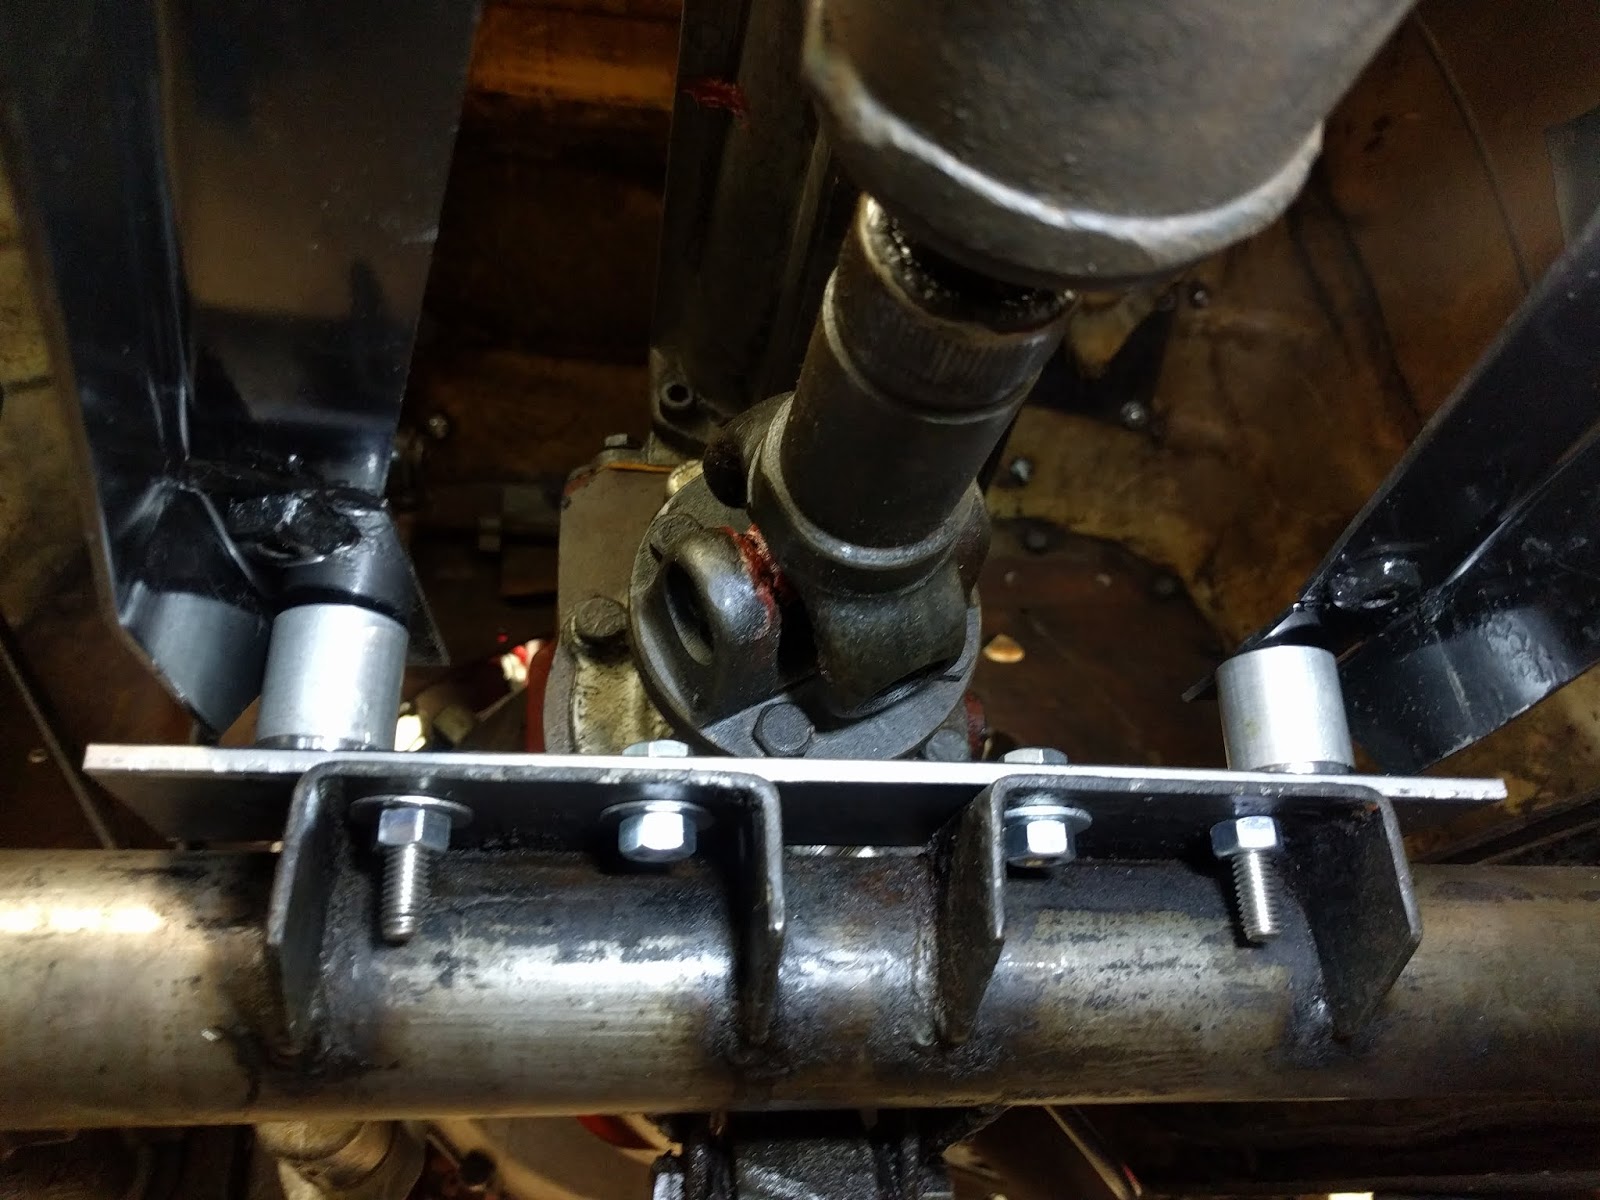
Kind of hard to decode, but it's basically a horizontal plate mounted with four bolts to the crossmember, with the outer two bolts actually threaded into the plate for clearance on top. The shiny round cylinders are tapped top and bottom, and they are attached to the plate, and the rails attach to them on top. Easy in retrospect, but it took multiple shop sessions to get it figured out and fabricated.
Afterward, I could install the transmission tunnel to check the fit and alignment, and it was all good:

I reinstalled the floor boards, this time attaching them to the rails as MG intended, and then the next step was to add a rubber part called a "fume excluder" around the brake and clutch pedal arms. That was missing altogether when I bought the car, and I soon learned why. I tried multiple times, and it was impossible to stretch over the arms! I contacted experts on the MG Experience Internet group, and got several suggestions including boiling the rubber to make it more pliable.
I recruited young, strong Troy Nace to help, and bought a cheap gas burner to boil the fume excluder. We then spent a couple of hours trying to stretch it into place, finally ripping it. It takes two pictures to fully capture the position Troy was in for many of those attempts!


I finally elected to cut the rubber so we could get it on the car. Then we began the process of adding foil-backed insulation (certainly not available in 1952) to cut down on heat transfer, and carpeting the rear transmission tunnel and under the seats. At that point, I could add the seat belts and reinstall the seats. Beck has seat belts!

Work continued across several days, sometimes with Troy's help and sometimes on my own. Fitting the insulation and carpet in the driver's footwell was particularly troublesome:

Finally, today I installed the last piece of carpet. Maybe not perfect, but miles better than before:

As a final bit of "bling," I bought some plush floor mats to go on top, complete with embroidered MG emblems. Looks great, huh?


As I write this, I have about 10 days before the Wheels and Wings car show at the Lancaster Airport. The LANCO MG Club is convening at that event again this year, and Beck and I will be in attendance if all goes well. Hard to believe that it was just last year that I first met Charlie, Cor and the others at that show, and from that found Beck TD! It will be a grand homecoming of sorts. Let's hope for great weather!
No comments:
Post a Comment