
So when I returned nearly two weeks later (been busy with concerts and other projects), I started by dousing the bolt again with penetrating oil (Promech, if you are interested), waited 15 minutes, and then started turning, a tiny bit at a time. After about 10 minutes, it finally freed up and came out. As you can see from the photo, there's a shiny bit of aluminum stuck in the first few threads - that was what was making it so hard to turn, along with the generally corroded state of the bolt.

I don't think that will be a real problem, because the threaded boss is at least an inch long. Losing a thread or two is not terminal. Still, I'll definitely replace all those bolts with new ones, and put a bit of anti-seize compound for the next guy.
Now that the project was back on track, the next problem to solve was how to support the front of the engine once the transmission is removed. if you don't do that, the engine comes crashing down into the radiator, ruining your day. Of course, the official BMW procedure is to use a special tool, shown at the left below. But Harbor Freight has one too (right picture), and it's only 80 bucks - with the ubiquitous 25% off coupons (I always have two or three in my wallet) it would be only 60 bucks.

But really, where's the fun in that? The whole purpose of the Grant St. Garage is to build stuff, so I decided to make my own, based on a design I saw various permutations of on the web. Basically, you make a substantial frame using a 4X4 post, and then lift from that. I didn't have a 4X4 handy, so I glued up my own post from 2X6 stock ripped to 4" tall.
When I got to the garage, I was so glad I made that decision, because the tools above would not have worked well in my case. Do you see in the left picture above how the place where the tool sits on each fender is horizontal? Here's what the Z3 fender looks like in that spot:

Not remotely flat, and with protuberances! The black bit sticking up is a rubber bumper, and I removed them on each side after marking how far they were threaded in. Then, I made a cardboard template, and used that to mark and cut (with a bandsaw) my wooden side supports to fit the inner fender such that the support is perfectly vertical:

They balanced OK like that, but I decided to secure them in a couple of way just so the whole thing wouldn't tip out and dent something. Besides, I felt like playing with my machine tools! So, I made a 3/8" post to fit in the hole that the rubber bumper was previously in, by using my lathe to score a cut mark at 1" (left picture), then cut them on my new metal cutting bandsaw (middle picture), and then back to the lathe to put a chamfer on each end (right picture).

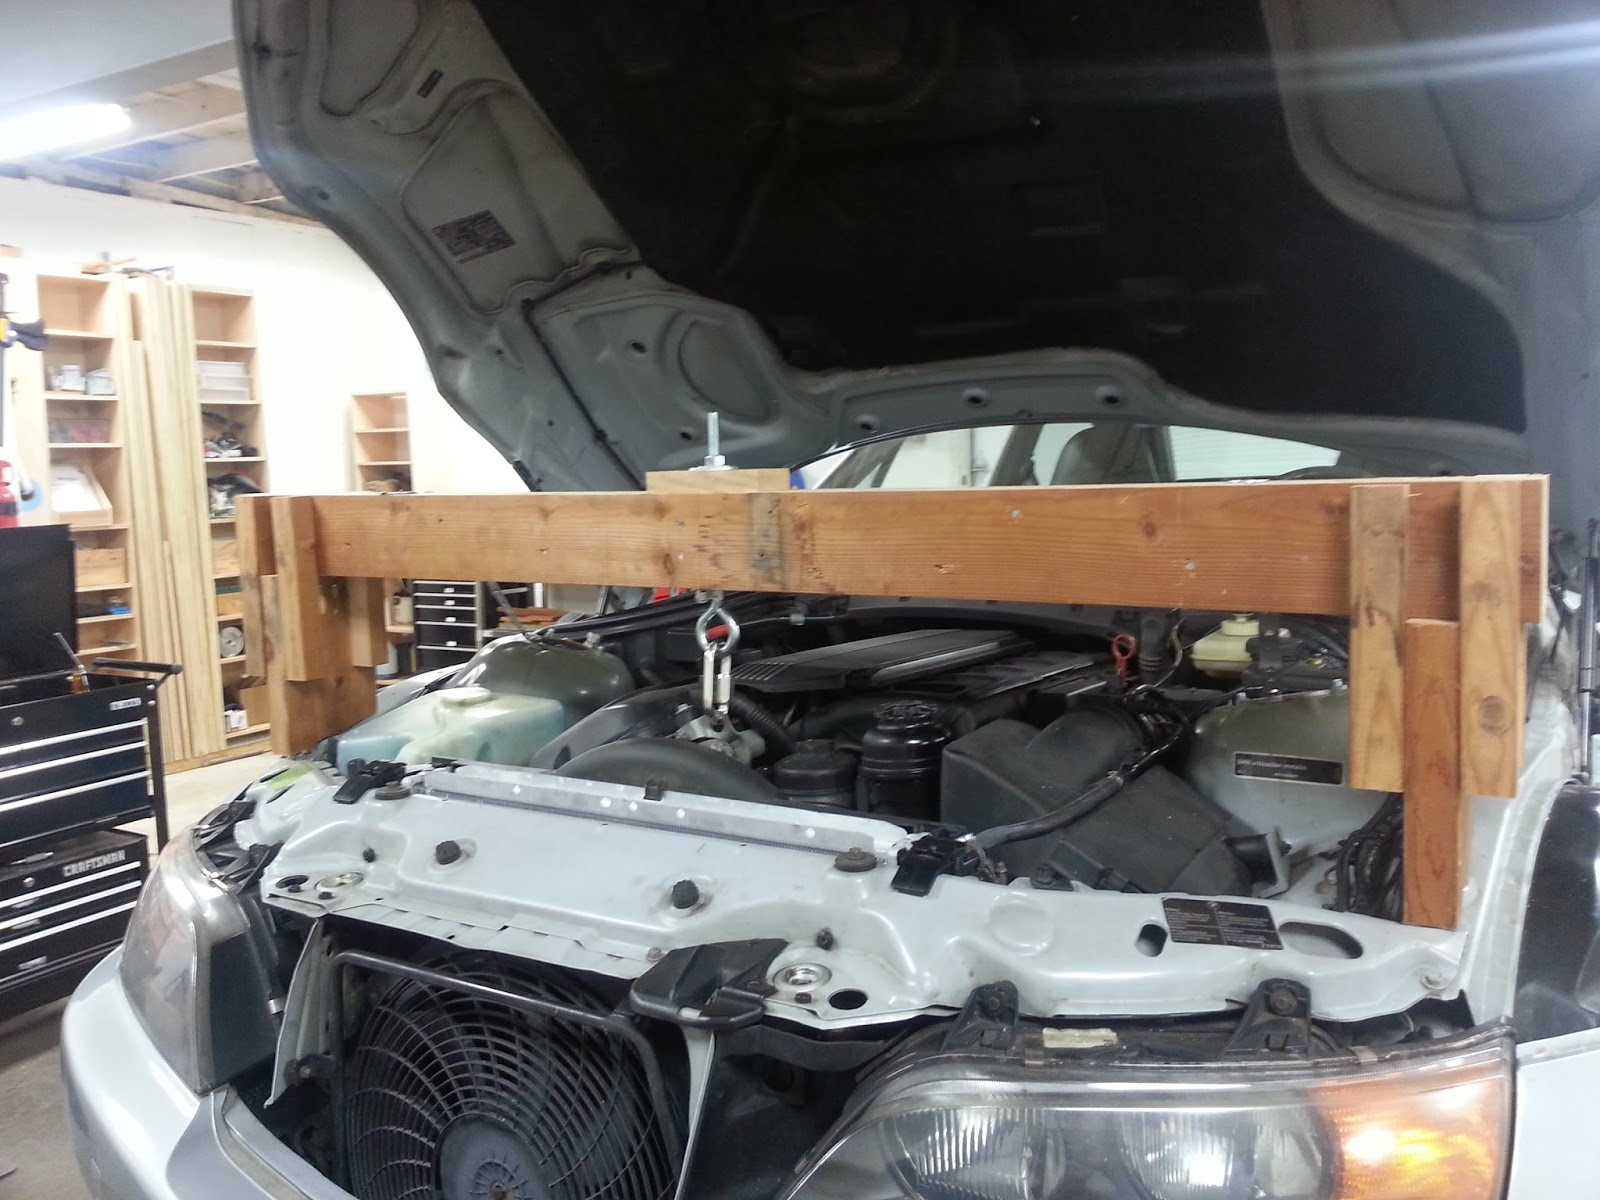
When I was done, I wound up with something that looked real official:

I also got soooo smart, and decided to use a special "U" size drill bit (0.368") to drill for the 3/8 (0.375") posts. That way they would be a tight hammer fit and wouldn't fall out. After I drilled, they were a slightly loose fit. I looked and I had pulled the "V" size bit (0.377") instead of "U." Duh. I hammered them in and they stayed put anyway.
After that, I fit the crossbeam and marked it, then secured it with screws, and some "flying buttresses" to make sure it wouldn't wobble:

One more safety bit - I put straps from the beam to the top of the shock mounts on each side. These don't bear weight, they just make sure the frame doesn't tip while I'm setting it up:

Once that was all built, the last piece was to attach the engine to it. That's where I really appreciated the designs I found on the web. My initial idea had been to use a strap clamp, but I wasn't sure it would be secure enough. The design I found uses a huge eye bolt through the beam, and a connector called a "quick link" to attach the eye bolt to the existing lift eye on the BMW. I probably went overboard with that quick link - it's rated at 3500 pounds, which means I could dangle the entire car from it.

So here's the finished product! It seems very secure - I am comfortable leaving the engine supported from that for as long as it takes to fix the transmission. In fact, as long as it's there, I may also use it to replace the motor mounts - I'll bet they are the original ones.
You know, while spending three and a half hours making this monstrosity, I could just hear the voice of my dear departed friend Dave Russell: "Why the hell do you always have to do things the most complicated way possible?" Guilty as charged, I guess. It's fun - as long as it works!
great ingenuity!
ReplyDelete